- MyShisha is a Muassal Shop (Tobacco) Shisha Equipment Accessories
- Special Price for Distributor Contact at Whatsapp number +62821 4540 8392
How to Set Up Hookah: Complete Step by Step Guide for Perfect Sessions

Setting up a hookah for the first time? I get it—looking at all those pieces can feel a bit overwhelming. But here’s the thing: once you nail the basics, you’ll be setting up your hookah in under 15 minutes.
A proper setup isn’t just about getting smoke—it’s about getting good smoke. The right water level, tight seals, and proper heat management make all the difference between a session that’s smooth and flavorful versus one that’s harsh and disappointing. In this guide, I’ll walk you through everything you need to know to get started.
Hookah Parts

Before we jump into the setup, let’s get familiar with the parts you’ll be working with. Knowing what each component does will make the setup process much smoother:
The Bowl: This sits at the top and holds your tobacco. It’s where the heat from the coals transfers to create smoke.
Bowl Stem: The small piece that connects and attaches the bowl to the main stem.
Coal Tray: A resting place for lit coals and catches falling ash. Essential for safety and convenience.
Stem (Body): The main vertical tube that connects the bowl, base, and hose together. This is the hookah’s backbone.
Stem Heart: The upper part of the stem that connects to the base. It includes the hose port and release valve.
Release/Purge Valve: The part that allows you to blow out stale smoke from the base. Super handy when you need a fresh start mid-session.
Hose: The flexible body that delivers smoke from the base to your mouth.
Hose Connector: Part of the hose that connects into the hose port on the stem.
Hose Handle: The mouthpiece where you inhale. Keep this clean!
Downstem: The bottom part of the stem that gets submerged in water. This is crucial for filtration and cooling.
Diffuser: A small attachment at the end of the downstem that breaks up bubbles for a quieter, smoother smoking session.
Base: The glass vase that holds the water. This filters and cools your smoke.
Now that you know your hookah’s anatomy, let’s get into the actual setup.
What You’ll Need Before Starting
Before diving in, let me make sure you’ve got everything ready:
Your Hookah Components:
- Glass base (the vase at the bottom)
- Stem (the main body)
- Bowl for your tobacco
- Hose with mouthpiece
- Rubber grommets for sealing connections
- Tongs for handling hot coals
Consumables:
- Quality hookah tobacco (your choice of flavor)
- Natural coconut coals (Tom – Is highly recommended for its premium quality)
- Clean water
- Ice cubes (optional, but great for cooler smoke)
Tools:
- Coal burner or stove
- Aluminum foil or any other heat management device
- Toothpick for poking holes
- Paper towels
Got everything? Let’s get started.
Step-by-Step Hookah Setup Instructions
Step 1: Fill the Base with Water

This is where many beginners mess up, but it’s actually pretty simple. Fill your glass base with water until it covers about 1 inch (2.5 cm) of the stem when inserted.
Want to test if it’s right? Cover the bowl port at the top and try to inhale through the hose—you should feel slight resistance, but it shouldn’t be hard to pull. Too much water makes it difficult to draw smoke; too little makes the smoke harsh and hot.
Pro tip: Add a few ice cubes for noticeably cooler, smoother smoke. Your throat will thank you.
Step 2: Assemble the Stem

Take your stem and insert it into the base using the rubber grommet. This seal needs to be airtight—no exceptions. A loose connection here means weak smoke and frustration.
Make sure everything’s snug. If your grommet feels too loose, slightly wet it or wrap a paper towel around it for a tighter fit. Check the purge valve is properly attached if your hookah has one.
Step 3: Attach the Hose

Connect your hose to the hose port using another grommet. Again, airtight is the goal here. Test it by covering the bowl port and trying to inhale—if air’s leaking in, fix that grommet connection.
If you’ve got a multi-hose hookah but you’re smoking solo, make sure to plug those unused ports. Otherwise, you’re just sucking in air instead of smoke.
Step 4: Pack Your Bowl

This is where the magic happens. Take your tobacco and fluff it up a bit—don’t just dump it straight from the package. You want it airy and loose.
For most bowls, you’ll want to sprinkle the tobacco gently, leaving about 2-3mm of space between the tobacco and where your foil or heat management device will sit. The tobacco shouldn’t touch the foil when you’re done.
Don’t overpack! This is probably the most common mistake I see. Packing too tight restricts airflow and gives you weak smoke. Think fluffy clouds, not compressed bricks.
Step 5: Cover with Foil or Heat Management Device

If you’re using aluminum foil (the budget-friendly option), use two layers for better heat distribution. Pull it tight across the bowl—no wrinkles. Then poke holes in a spiral pattern or a grid using a toothpick. Not too many, not too few—around 15-20 holes usually works.
Using a heat management device (HMD)? Even easier. Just place it on top of the bowl and make sure it sits stable. HMDs give you more consistent heat and are harder to mess up.
Step 6: Light Your Coals

If you’re using natural coconut coals like Tom (which you should be—they’re cleaner and last longer), place them on your coal burner and wait until they’re completely red and glowing. This usually takes 10 minutes. Don’t rush this step.
Quick-light coals? Wait until all the sparking completely stops before using them. And please, make sure you’re in a well-ventilated area. Safety first.
Step 7: Start Your Session

Place 3-4 coals on your foil or HMD, spacing them evenly. Now here’s the key: wait. Give it 5-8 minutes for the tobacco to heat up properly. I know you’re excited, but patience pays off.
After the warm-up, take a slow, steady test puff. The smoke should be smooth and flavorful. If it’s harsh, remove a coal. If it’s weak, give it more time or add heat.
Common Setup Mistakes (And How to Avoid Them)
Overpacking the bowl: Leads to restricted airflow and burnt tobacco. Keep it fluffy.
Wrong water level: Too high makes it hard to pull; too low makes it harsh. Stick to that 1-inch rule.
Ignoring air leaks: Check every grommet connection. Leaks kill your session.
Impatient with coals: Partially lit coals taste terrible and can be dangerous. Wait for that full glow.
Rushing the heat-up: Give your tobacco time to warm up. Those first few minutes matter.
Most Common problems You can Face with Shisha Set Up
Harsh smoke? You’ve got too much heat. Remove a coal or move them to the edges of the bowl.
Weak, thin smoke? Not enough heat. Add another coal or move them closer to the center.
Hard to inhale? Check your water level and make sure nothing’s blocking your bowl.
The device has an air leak? Go through every connection and tighten those Elements.
Burnt taste? Your coals might be too close or your tobacco is touching the foil. Adjust accordingly.
Pro Tips: Level Up with Mixology
Now that you’ve mastered the basics, here’s where things get interesting. I prefer to use Mezza. Mezza Mixology is an art. you can combine different Mezza tobacco flavors to create unique taste experiences that go beyond single-flavor sessions.
Think of it like being your own flavor chemist—mixing percentages to craft the perfect blend for your palate. Here are some popular combinations I recommend trying:
Fruity Blend:
- Tropical Crown (25%) + Jungle Jive (35%) + Maramanga (10%) + North (10%)
- Perfect tropical explosion with a cool finish
Berry Blast:
- Summer Jam (30%) + Raspberry (50%) + Süss-Sauer (20%)
- Want it cooler? Add North (10%) and adjust Raspberry to (40%)
Creamy Dream:
- Bananza (40%) + Moo Juice (25%) + Creamy Nuts (35%)
- For an icy version: Creamy Nuts (30%) + Moo Juice (20%) + North (10%)
Want to try these combinations? You can buy Mezza flavors at MyShisha and experiment at home, or experience them ready-made at Eden Hookah Club (available at all 4 Bali locations : Canggu, Seminyak, Uluwatu and Ubud) or order through GoShisha Bali delivery service.
Get Everything You Need at MyShisha
Now that you know how to set up your hookah properly, it’s time to get your hands on quality equipment and premium tobacco. MyShisha is retail shisha store which you need for everything. It’s Very popular hookah store in Indonesia. here you can find all: complete hookah sets, bowls, shisha accessories, heat management devices and premium tobacco brands.
Whether you’re building your first setup or upgrading your current one, MyShisha has covered you
Find MyShisha Stores:
- MyShisha Kerobokan, Bali – Perfect for tourists and locals in the heart of Bali
- MyShisha Ubud, Bali – Your hookah spot in the cultural center
- MyShisha Bogor – Serving Jakarta and surrounding areas
Shop Online:
How to Connect With MyShisha:
- Instagram: @myshisha.bali | @myshisha.bogor
- WhatsApp Bali: +62 821-4540-8392
- WhatsApp Bogor: +62 812-8898-0610
Don’t Feel Like Setting Up at Home?
Totally understandable — sometimes you just want to relax and enjoy hookah without the setup hassle. Here are some convenient alternatives:
Eden Hookah Club – Premium Lounge Experience
Want the full hookah experience without lifting a finger? Head over to Eden Hookah Club. With 4 locations across Bali (Seminyak, Canggu, Ubud, and Uluwatu), they’ve got everything set up perfectly, premium tobacco selections, and a great atmosphere to chill with friends. Just show up, order your flavor, and enjoy. Let the pros handle the setup while you focus on the vibes.
Delivery Straight to Your Door – Try GoShisha Bali
Craving hookah but prefer to stay home? GoShisha Bali delivers complete hookah setups right to your door. They’ll bring everything you need—hookah, coals, tobacco—so you can enjoy a premium session without leaving your place.
Order via:
- Instagram: @goshisha_bali
- WhatsApp: +62 813-3777-4573
Best overall: A Few Final Tips
“Setting up a hookah properly might seem complicated at first, but trust me—once you get the hang of it, it becomes second nature. The key is taking your time with each step, using quality equipment and coals, and not rushing the process.
Got questions about which equipment to buy? The team at MyShisha is always ready to help you get the perfect setup. Whether you’re visiting their stores in Bali or Bogor, shopping online, or reaching out via WhatsApp—they’ve got the expertise to guide you.”
Remember: if you’re not in the mood to set up, Eden Hookah Club and GoShisha Bali have got you covered with ready-to-enjoy options.
Happy smoking!
Tags: beginner hookah guide, hookah for beginners, hookah setup, how to set up hookah, Mezza tobacco, myshisha, shisha set up

How to Set Up Hookah: Complete Step by Step Guide for Perfect Sessions

When you look closely at a shisha setup, you’ll notice a thin layer of aluminum foil stretched tightly over the bowl, separating the hot charcoal from the flavored tobacco (also known as shisha molasses).While it may seem like a simple step, that shiny sheet plays a crucial role in shaping the flavor, temperature, and smoothness… selengkapnya
Choosing the right shisha flavor can sometimes be confusing, especially with so many options available. Based on user reviews, community feedback, and hookah enthusiasts’ recommendations in Indonesia, here are the Top 5 Tombacco flavors most loved and recommended. 1. Caramel – Creamy & Smooth The Caramel Tombacco flavor is often mentioned as one of the… selengkapnya

The Rise of Eco-Friendly Hookahs and Sustainable Hookah Accessories in 2025 In 2025, the hookah industry is undergoing a green revolution. Growing consumer demand for environmentally responsible smoking options has driven manufacturers to prioritize sustainability across all aspects of hookah design and use. From biodegradable charcoal and modular components to recyclable packaging and reusable accessories,… selengkapnya
Introducing Tombacco’s latest lineup of premium shisha flavors, available at just Rp 33,000 for a generous 50-gram portion. Each flavor offers a distinct taste experience crafted from high-quality ingredients for the ultimate smoking session. Tombacco Passion Fruit (50g/Rp 33,000) This exotic flavor perfectly balances sweet and tart notes, delivering an authentic tropical experience. The initial… selengkapnya

Looking for Love 66 Alternatives? Here’s What Smokers Are Choosing Love 66 has been a go-to shisha flavor for years. Its sweet, fruity taste with a light cooling finish makes it easy to enjoy, whether you smoke occasionally or on a regular basis. But when Love 66 becomes hard to find, many smokers naturally start… selengkapnya
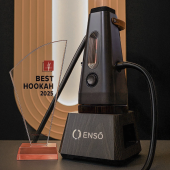
The Future of Hookah is Here – And It’s Coal-Free For centuries, hookah enthusiasts have relied on charcoal to fuel their sessions—but with that comes the hassle of heat management, harsh smoke, and inconsistent flavors. Enter ENSO, the next-generation electric hookah that promises to eliminate coal dependency while delivering rich, smooth vapor. Available now at myshisha.id, this sleek device is… selengkapnya

When it comes to premium shisha experiences, few brands are as synonymous with quality and consistency as Al Fakher. Established in 1999 in the United Arab Emirates, Al Fakher has grown to become a globally recognized name in the world of hookah, offering a refined smoking experience that appeals to both beginners and seasoned enthusiasts…. selengkapnya
If you’re a hookah enthusiast, the first thing is you want top-quality products & accessories for elevating your smoking experience. The myshisha speaks for itself and has become the end point of choice for those who admire craftsmanship, top flavors, and attractive design. MyShisha features a carefully selected range of high-end offerings, such as… selengkapnya
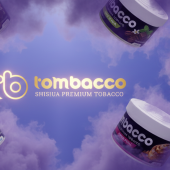
7 Unique Tombacco Shisha Flavors You Must Try — Available at myshisha.id If you’re a shisha lover seeking to explore Tombacco shisha flavors that are distinctive, bold, and unforgettable, then the Tombacco line is definitely for you. Known for its premium blends and creative flavor profiles, Tombacco combines cultural richness, dessert indulgence, and tropical freshness… selengkapnya

Understanding how charcoal affects shisha flavor is essential for achieving a smooth, flavorful, and enjoyable hookah session. While many smokers focus on choosing the right flavor or hookah device, the truth is simple: charcoal plays the biggest role in shaping heat, smoke quality, and the accuracy of your flavor profile. Premium coconut charcoal brands such… selengkapnya
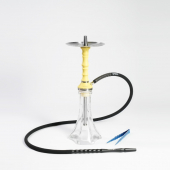
SPHINH – YELLOW Made in RUSSIAN with a very good and modern shisha. include hose Silicone, Tongs,, | (diffuser soft )
Rp 1.045.000
“Rasa apel” mengacu pada rasa dan aroma dari buah apel, yang merupakan salah satu buah yang paling populer dan banyak dikonsumsi di seluruh dunia. Apel memiliki rasa yang renyah dan menyegarkan dengan tingkat manis dan keasaman yang berbeda-beda, tergantung pada jenisnya. Rasa apel sering digambarkan sebagai kombinasi manis dan keasaman yang halus. Berbagai varietas apel… selengkapnya
Rp 175.000

Features and innovations Steamulation Purge Pro X III (Optimized!) The Steamulation Pro X III features the world’s most advanced purge system for multi-tube shishas. The unique Steamulation Purge Pro valves allow any user to easily blow out the bowl without having to remove valve balls. The valves on all four smoke ports work automatically in… selengkapnya
Rp 6.490.000


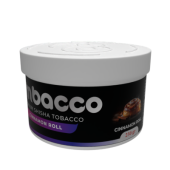
CINNAMON ROLL Wake up to a cinnamon sugar rush! Cinnamon Roll shisha wraps you in warm, fuzzy feelings. Rich, velvety cinnamon and sweet, buttery notes harmonize in a shisha experience reminiscent of freshly baked pastries.
Rp 175.000
How to Set Up Hookah: Complete Step by Step Guide for Perfect Sessions
Hot Items!
 Tombacco Bubble Gum Herbal Molasses
 Darkside Breaking red
 ALADIN MVP 480
 Adalya Ice Bonbon
 KS Silko Killer || Shinny Glow
Brands


![]()
MyShisha Kerobokan
Store: JL.Raya Kerobokan No 66 Kerobokan Kelod, Kec. Kuta Utara, Kab. Badung Bali, 80361.

 View Location on Map
![]()
MyShisha Canggu
(EDEN HOOKAH CLUB CANGGU)
Taman Tomora, Jl. Raya Semat, Tibubeneng, Bali 80361
![]()
MyShisha Seminyak
(EDEN HOOKAH CLUB SEMINYAK)
Jl. Petitenget No.78A, Kerobokan Kelod, Bali 80361.
![]()
MyShisha Bogor
Store: Jl. Pakuan, RT 005 / RW 008, kel. Baranang Siang, kec. Bogor Timur, Kota Bogor. 16143
![]()
MyShisha Ubud
(EDEN HOOKAH CLUB UBUD)
Jl. Cok Putra, Sudarsana, Kecamatan Ubud, Kabupaten Gianyar, Bali 80571.
![]()
MyShisha Uluwatu
(EDEN HOOKAH CLUB uluwatu)
Jl. Raya Uluwatu No.11, Ungasan, Kec. Kuta Sel., Kabupaten Badung, Bali 80364.
Saat ini belum tersedia komentar.